
3 Nursery Layouts
Your bundle of joy is on the way, and it’s time to create the perfect nursery! Designing a cozy, functional space for your little one can feel overwhelming...especially with so many options for cribs, rugs, lamps, dressers, changing tables, rocking chairs, and more.
To make things easier, we’ve created three unique nursery layouts to help you visualize how to arrange your furniture. Each layout offers a different flow, so you can choose the one that works best for your space and lifestyle.
Let’s take a closer look at each design and what makes it special!
Option 1: Cozy Corner Layout
In this layout, the focus is on creating a snug and intimate space for bonding moments with your baby.
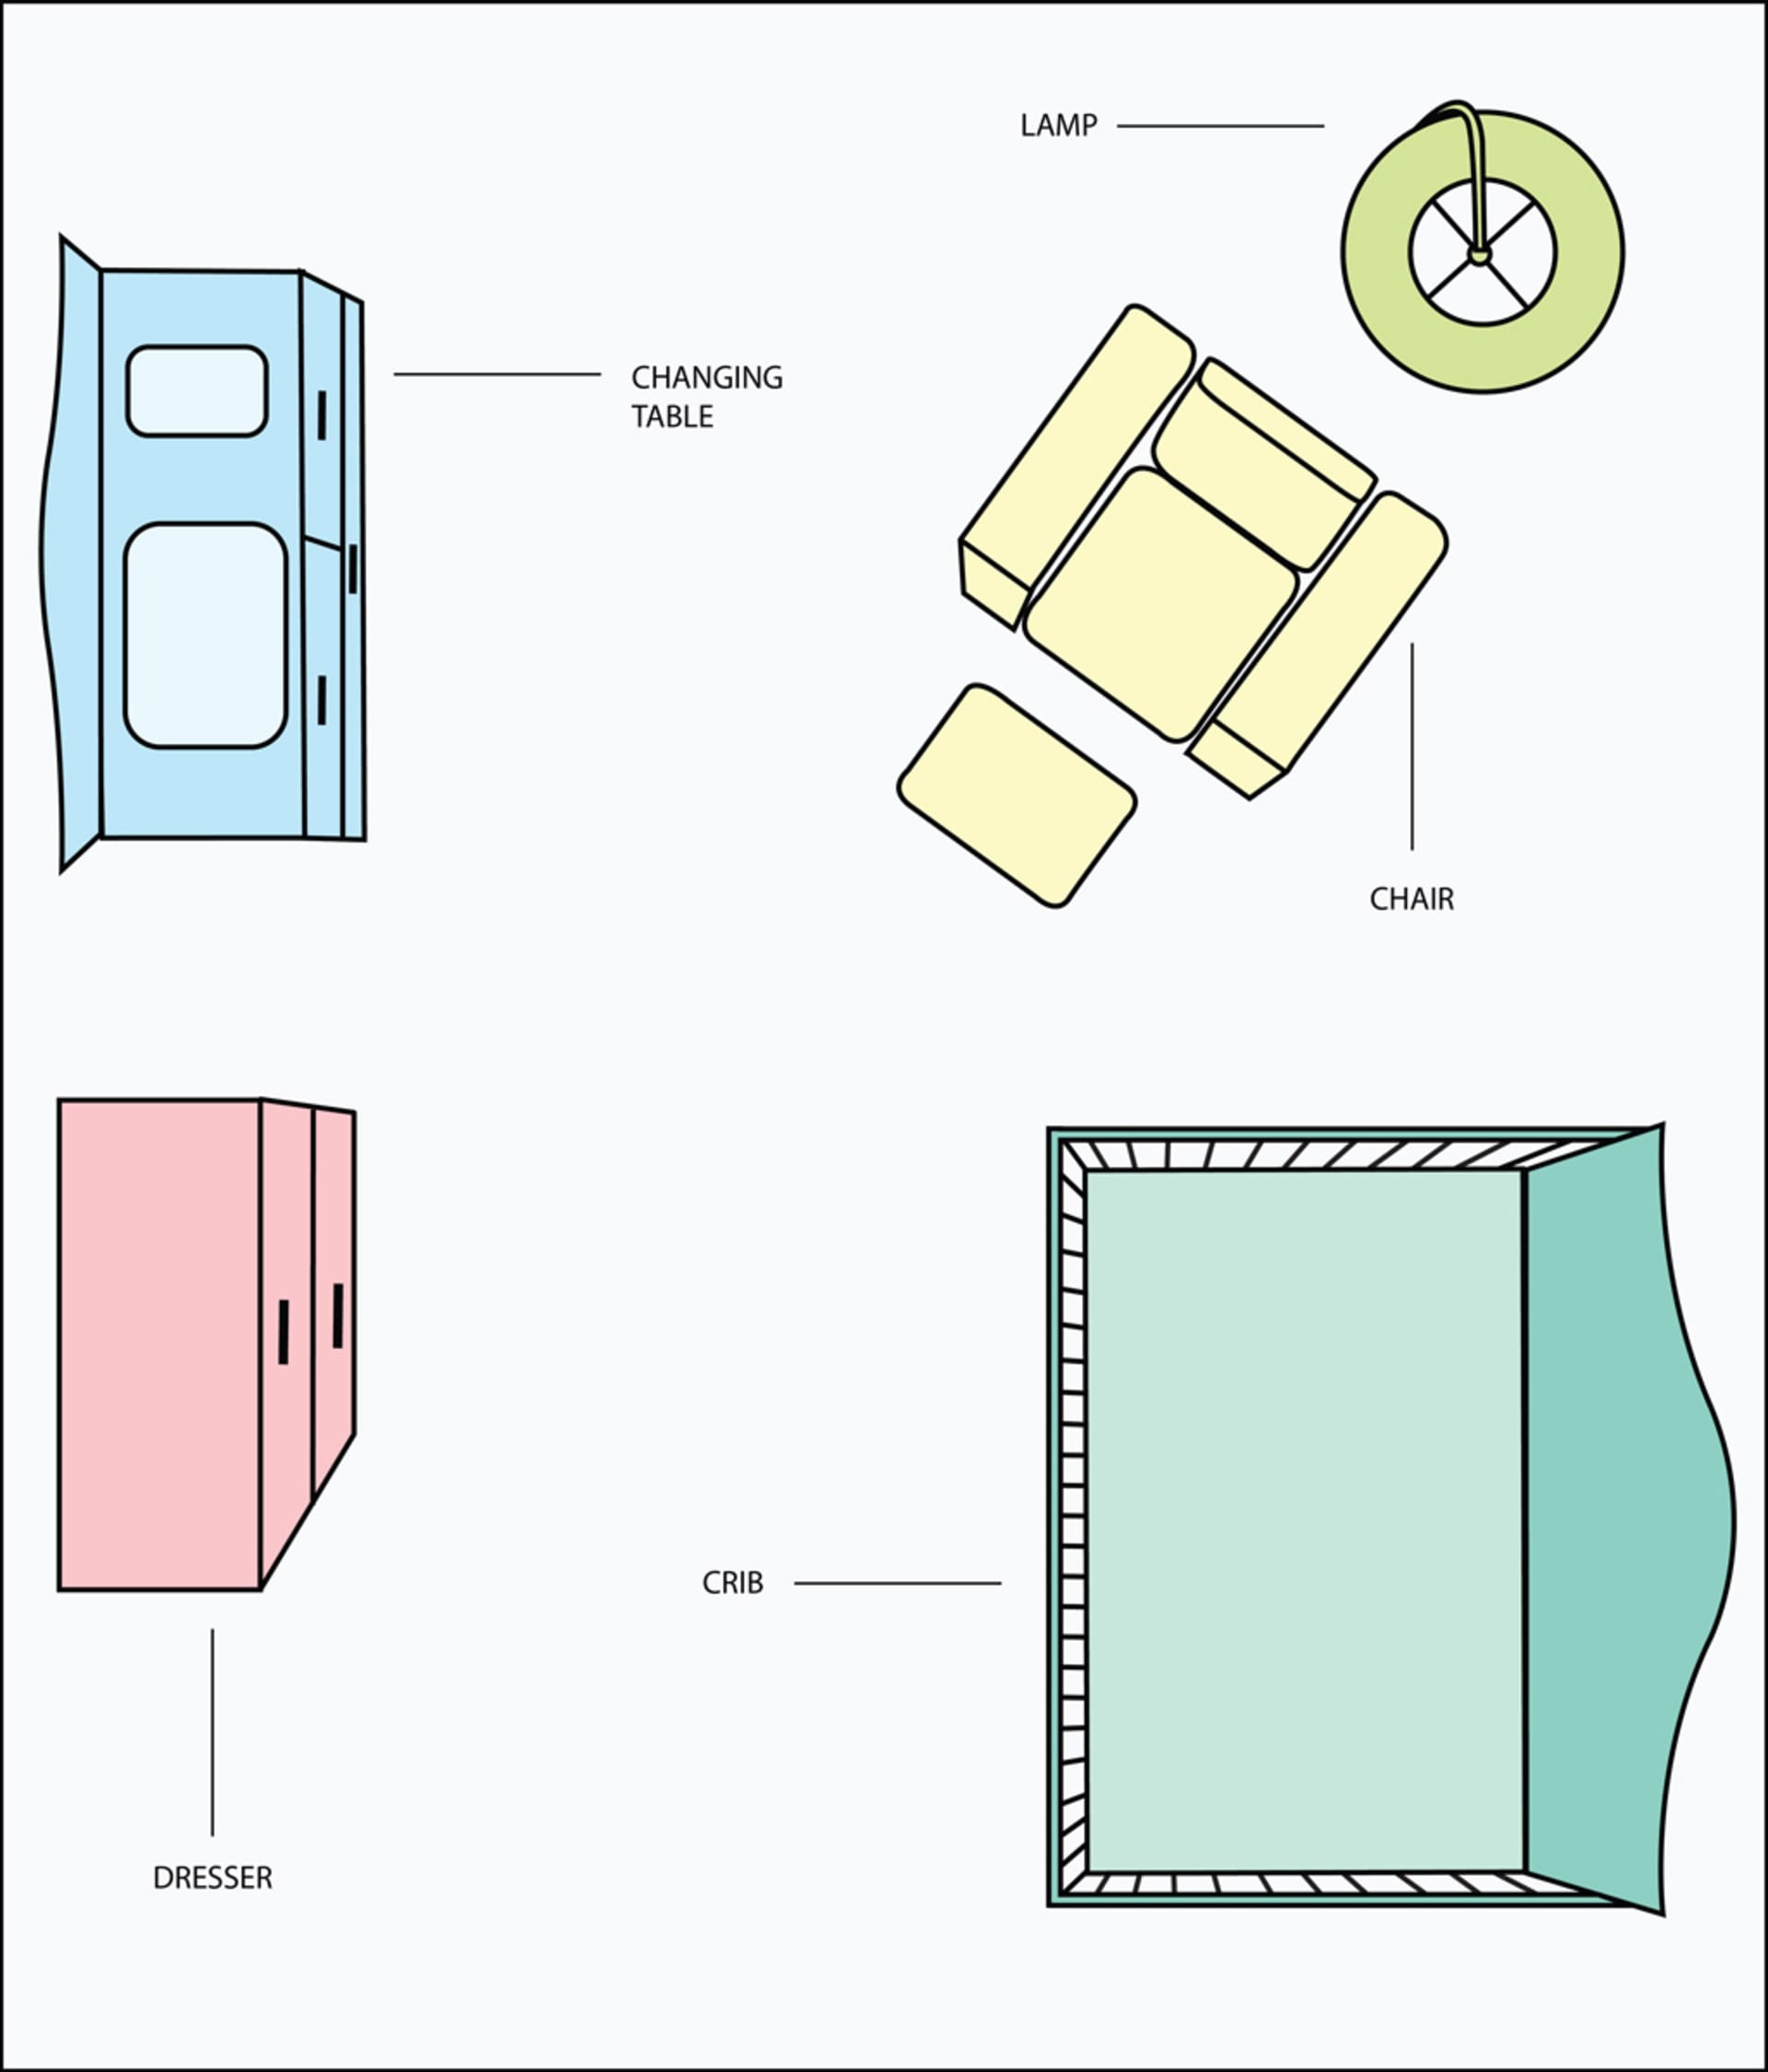
- Crib Placement: The crib is positioned along the right wall, making it easily accessible and central to the room’s design.
- Chair & Lamp: The rocking chair and floor lamp are tucked together in the top-right corner near the crib. This arrangement creates a cozy nook for late-night feedings or storytime.
- Dresser & Changing Table: Both are placed along the left wall, directly across from the crib. This setup keeps everything within arm’s reach while maximizing floor space.
Why it works: This layout is perfect for smaller nurseries or parents who want everything close together for convenience. The chair-lamp pairing near the crib ensures a warm and practical feeding area.
Option 2: Open & Spacious Layout
This layout spreads out the furniture to give the room a more open and airy feel.
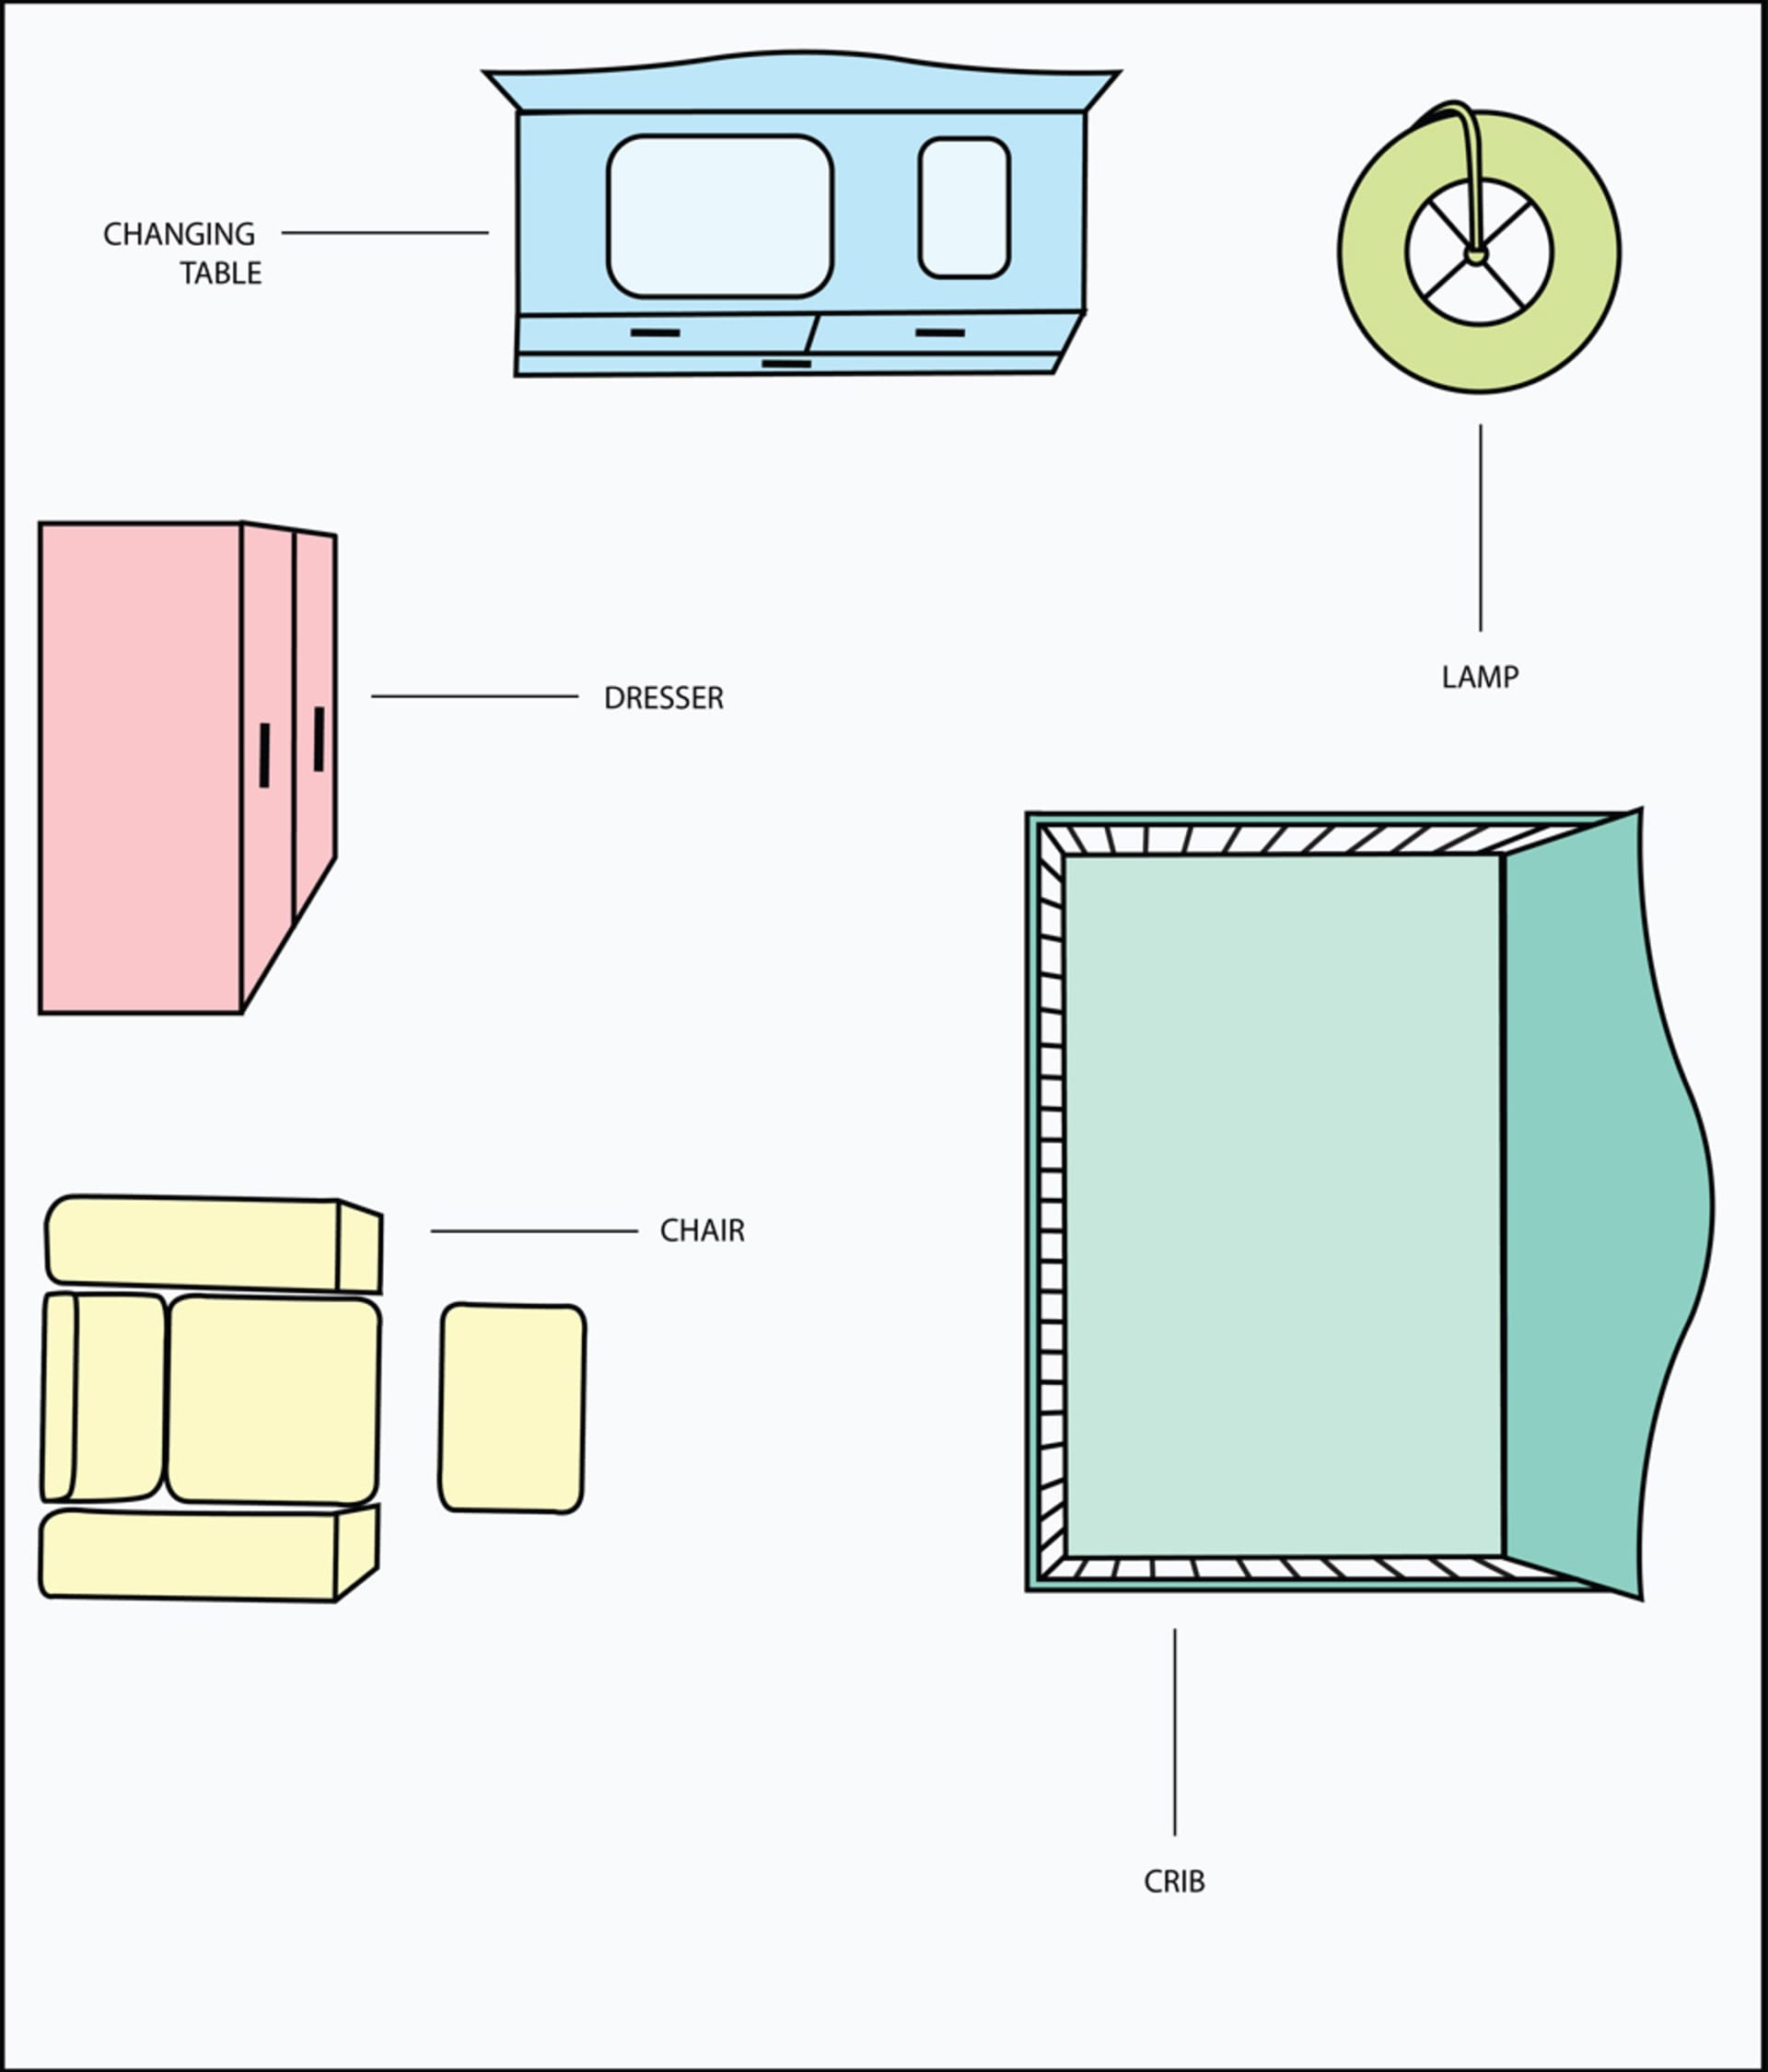
- Crib Placement: Like Option 1, the crib is along the right wall but with more space around it.
- Lamp Placement: The lamp remains in the top-right corner for consistent lighting throughout the room.
- Chair & Dresser: The rocking chair moves to the left wall alongside the dresser, creating a distinct seating area separate from the crib.
- Changing Table: Positioned at the top of the room, this setup allows for easy access without crowding other furniture.
Why it works: Ideal for larger nurseries or parents who prefer a more spacious design. This layout separates key areas—sleeping, changing, and sitting—while maintaining functionality.
Option 3: Balanced Layout
This design focuses on symmetry and balance by rearranging key pieces of furniture.
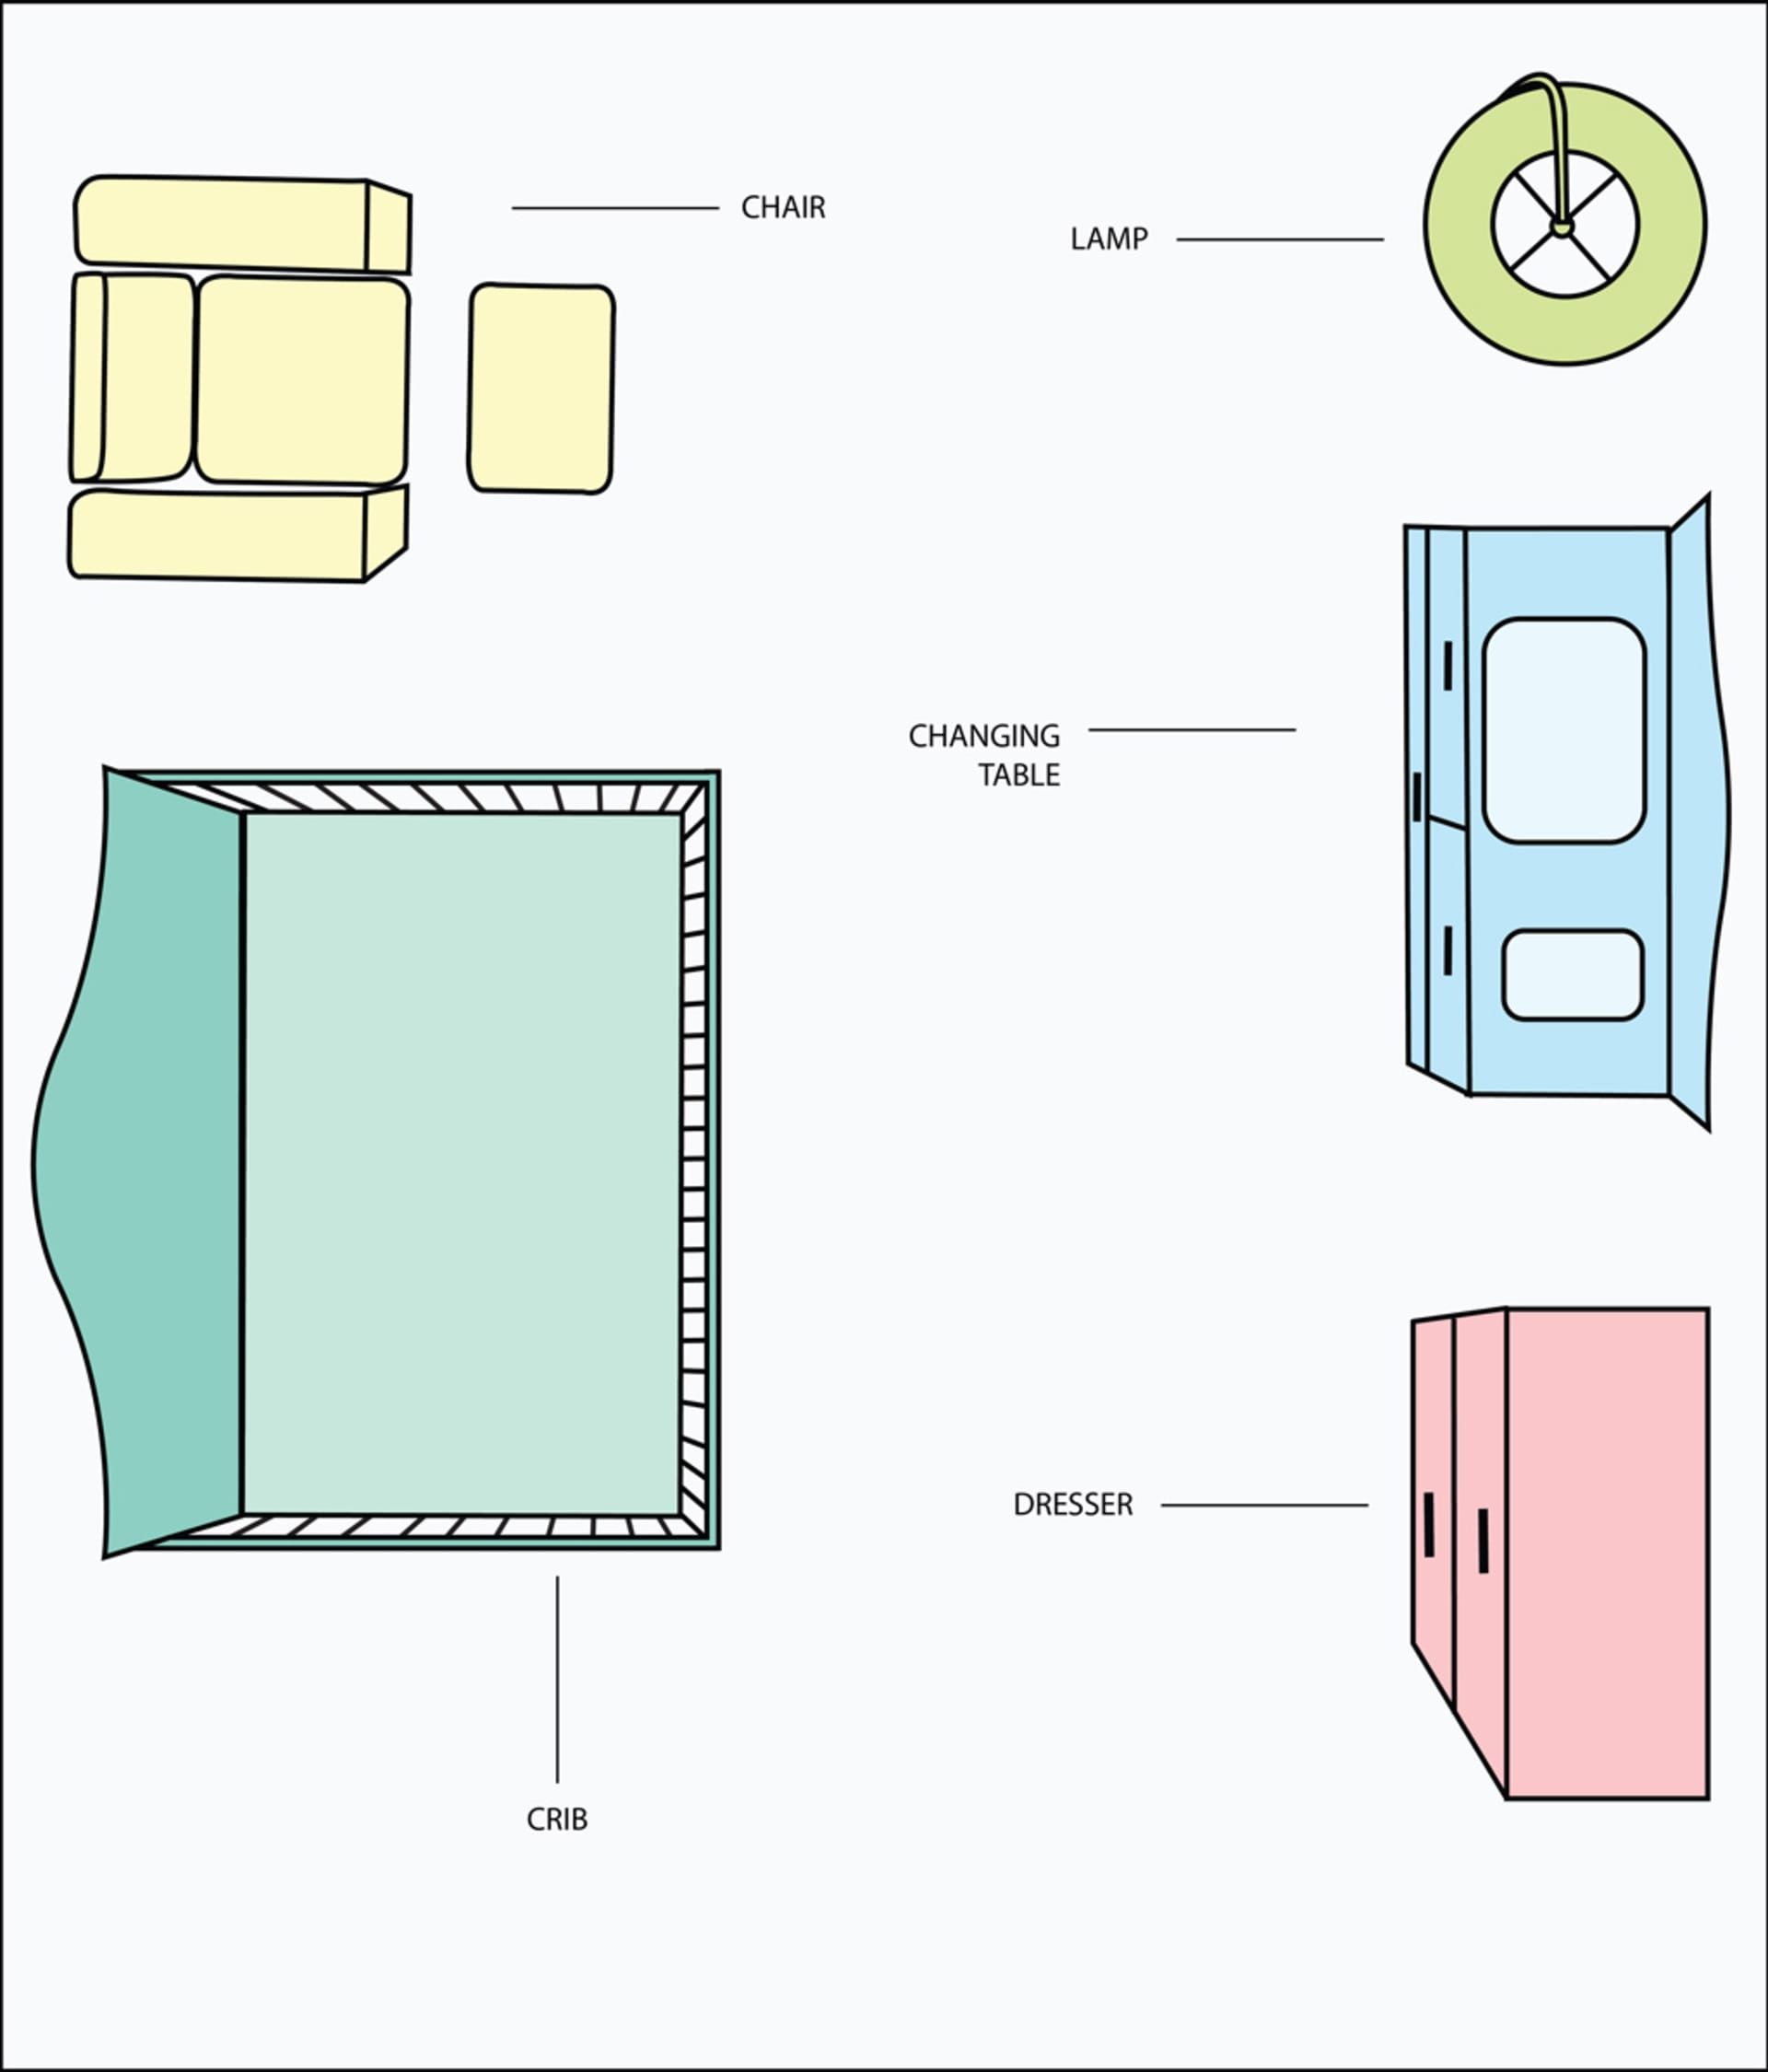
- Crib Placement: The crib is moved to the left wall, creating a fresh perspective compared to Options 1 and 2.
- Chair Placement: The rocking chair joins the crib along the left wall, forming a cohesive sleeping and seating area.
- Dresser & Changing Table: Both are placed on the right wall for balance, with plenty of room to organize baby essentials.
- Lamp Placement: The lamp stays in its familiar spot in the top-right corner, providing consistent lighting across all layouts.
Why it works: This layout is great for parents who value symmetry and want a clear division between sleeping and storage areas. It also provides flexibility for future adjustments as your child grows.
Customizing Your Nursery
While these layouts offer inspiration, every nursery is unique! Feel free to mix and match elements to fit your space and style. Here are some tips to keep in mind:
- Save Space: Consider using a dresser with a changing pad on top instead of a separate changing table.
- Skip What You Don’t Need: If you don’t plan on using a rocking chair, you can save valuable floor space by leaving it out.
- Prioritize Comfort: Late-night feedings are much easier with a cozy chair near your baby’s crib.
No matter which layout you choose, remember that your nursery should reflect your family’s needs and style. Have fun designing this special space—you’ll be spending lots of precious moments here!